YOUR MORNING RESET
After a night of rest, it’s common to wake up feeling a little stiff or sluggish. Gentle movement first thing in the morning helps shake off that heaviness, re-energise the body, and set the tone for a more grounded, vibrant day. Morning movement releases endorphins, increases oxygen flow, and boosts circulation – leaving you feeling more awake, clear-headed, and ready to meet the day.
Yoga is one of the most effective and accessible ways to get moving in the morning. It gently stretches and strengthens the entire body, mobilises the spine in all directions, and opens up the hips – especially helpful if you spend much of your day sitting. By focusing on key areas like the spine, hips, and shoulders, yoga helps relieve tension, improve posture, and support pain-free movement. This physical reset also uplifts your mood and cultivates a sense of emotional clarity and openness.
A consistent morning yoga practice does more than just wake you up. It supports digestion, balances hormones, boosts metabolism, and strengthens your immune system. Most importantly, it creates intentional space for self-care before the demands of the day begin – grounding your energy, aligning your body and mind, and helping you show up with more presence and resilience.
MORNING YOGA IN WINTER
Winter invites a more contemplative, inward rhythm — shorter days, cosy evenings at home, and a naturally slower pace of life. A morning yoga practice gently balances this seasonal slowing with steady, flowing movement that warms the body and clears the mind.
Standing poses, balance challenges and mindful core work build strength, heat and concentration. Fluid transitions, twists, gentle backbends and balance challenges boost circulation, increase energy and help wake up the thinking brain.
At the same time, winter is a season where we can honour the body’s instinct to hibernate. Gentle breathwork, hip openers and supported inversions allow us to soften and restore. Supporting yourself with consistent yoga practice during winter helps lay the foundations for a resilient immune and respiratory system, often under greater challenge at this time of year. This is not usually the time for deep backbends or strong inversions, but rather for practices that are warming, grounding and nourishing — moving slowly, like warm honey.
Your winter morning practice can help you stay uplifted and positive through the darker, colder days. There is something quietly beautiful about stepping onto your mat and greeting the day as it slowly awakens in the early morning light.
EXPLORING WINTER MORNINGS FLOW IN YOUR PRACTICE
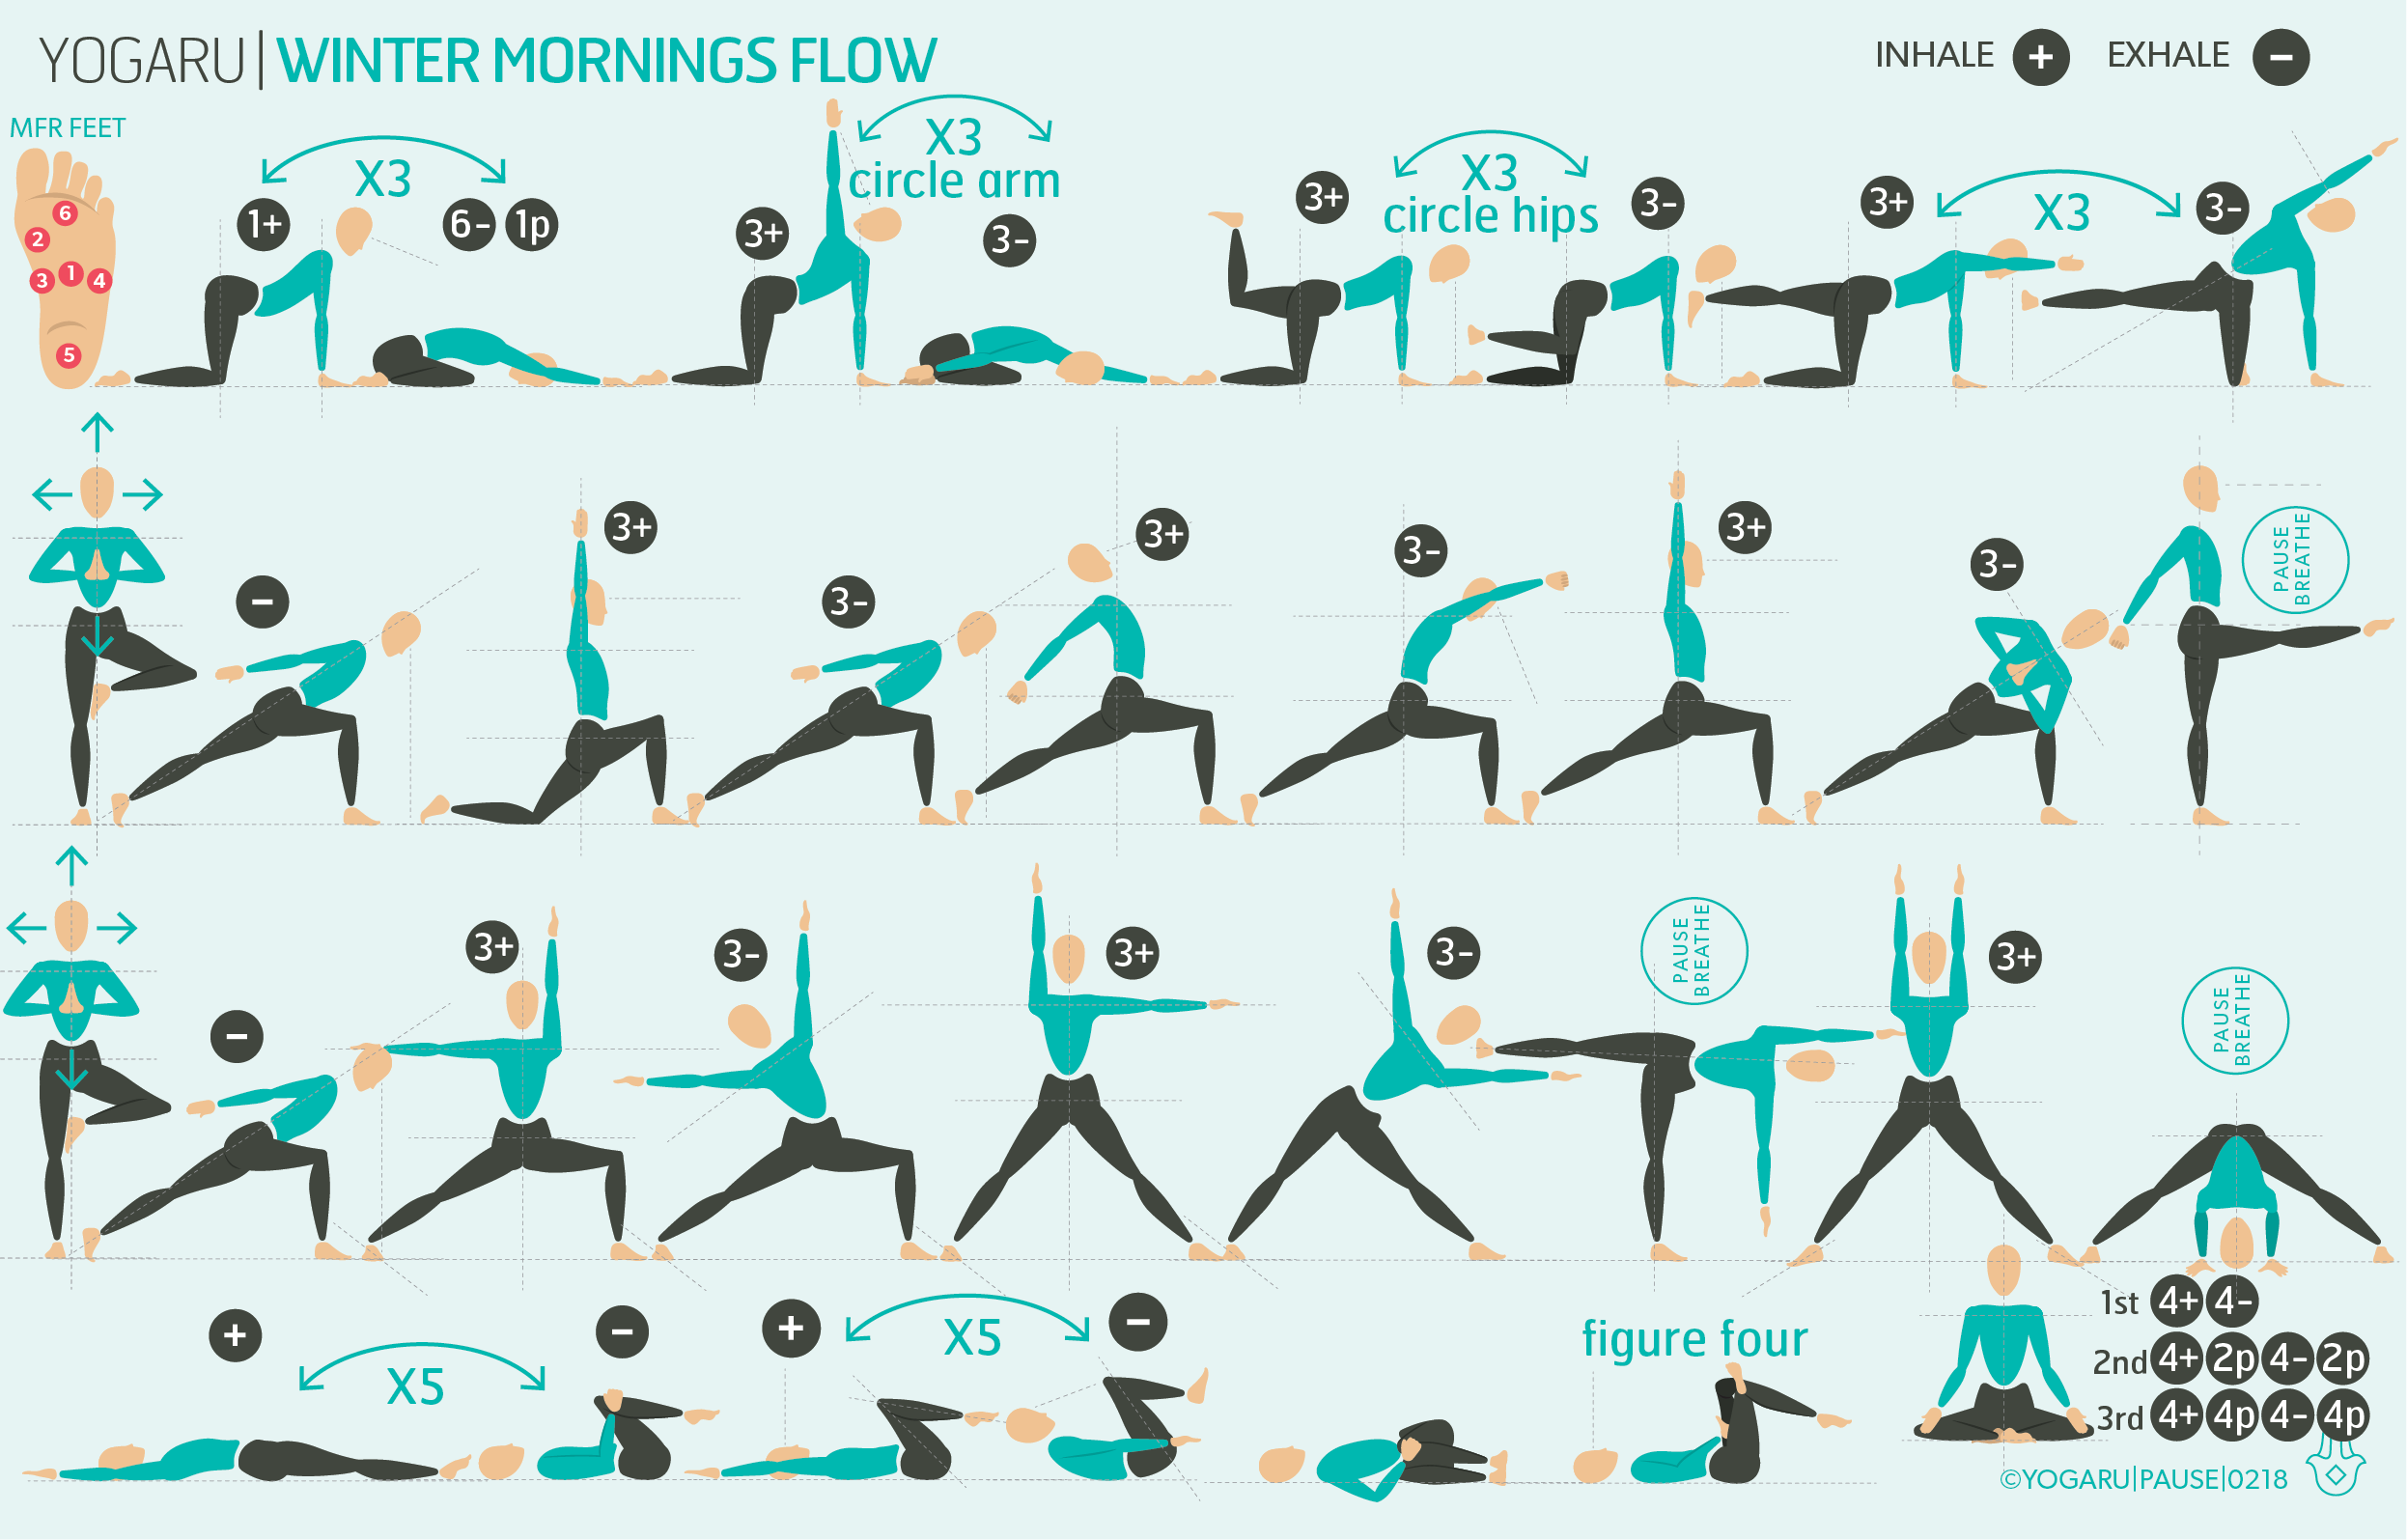
This sequence starts in the first row with MFR on the feet followed by breath led spine, shoulder and hip mobility to warm up the muscles and get circulation going. The second and third row are your standing flows, continuing with 3 in and 3 out beathe led flow. Take your time and transition from pose to pose with control. Each standing row starts with a balance challenge where you will take tree pose and gaze up, down, left, right. Remember to do this on both sides. Complete each full line with the right leg forward and then repeat the line with the left leg forward – this is one full round of the flow. For a longer practice you can repeat these two standing flows. The final row offers core work to complete your practice with some deep internal warmth and posture support for the day ahead.
Instead of ending in the traditional Savasana, the sequence closes with Samavritti Pranayama – equal breath – to focus the mind and regulate the nervous system. Morning breathwork sets you up for the day in the present moment and helps calm the mind from racing ahead to the next task.
ALIGNMENT CUES
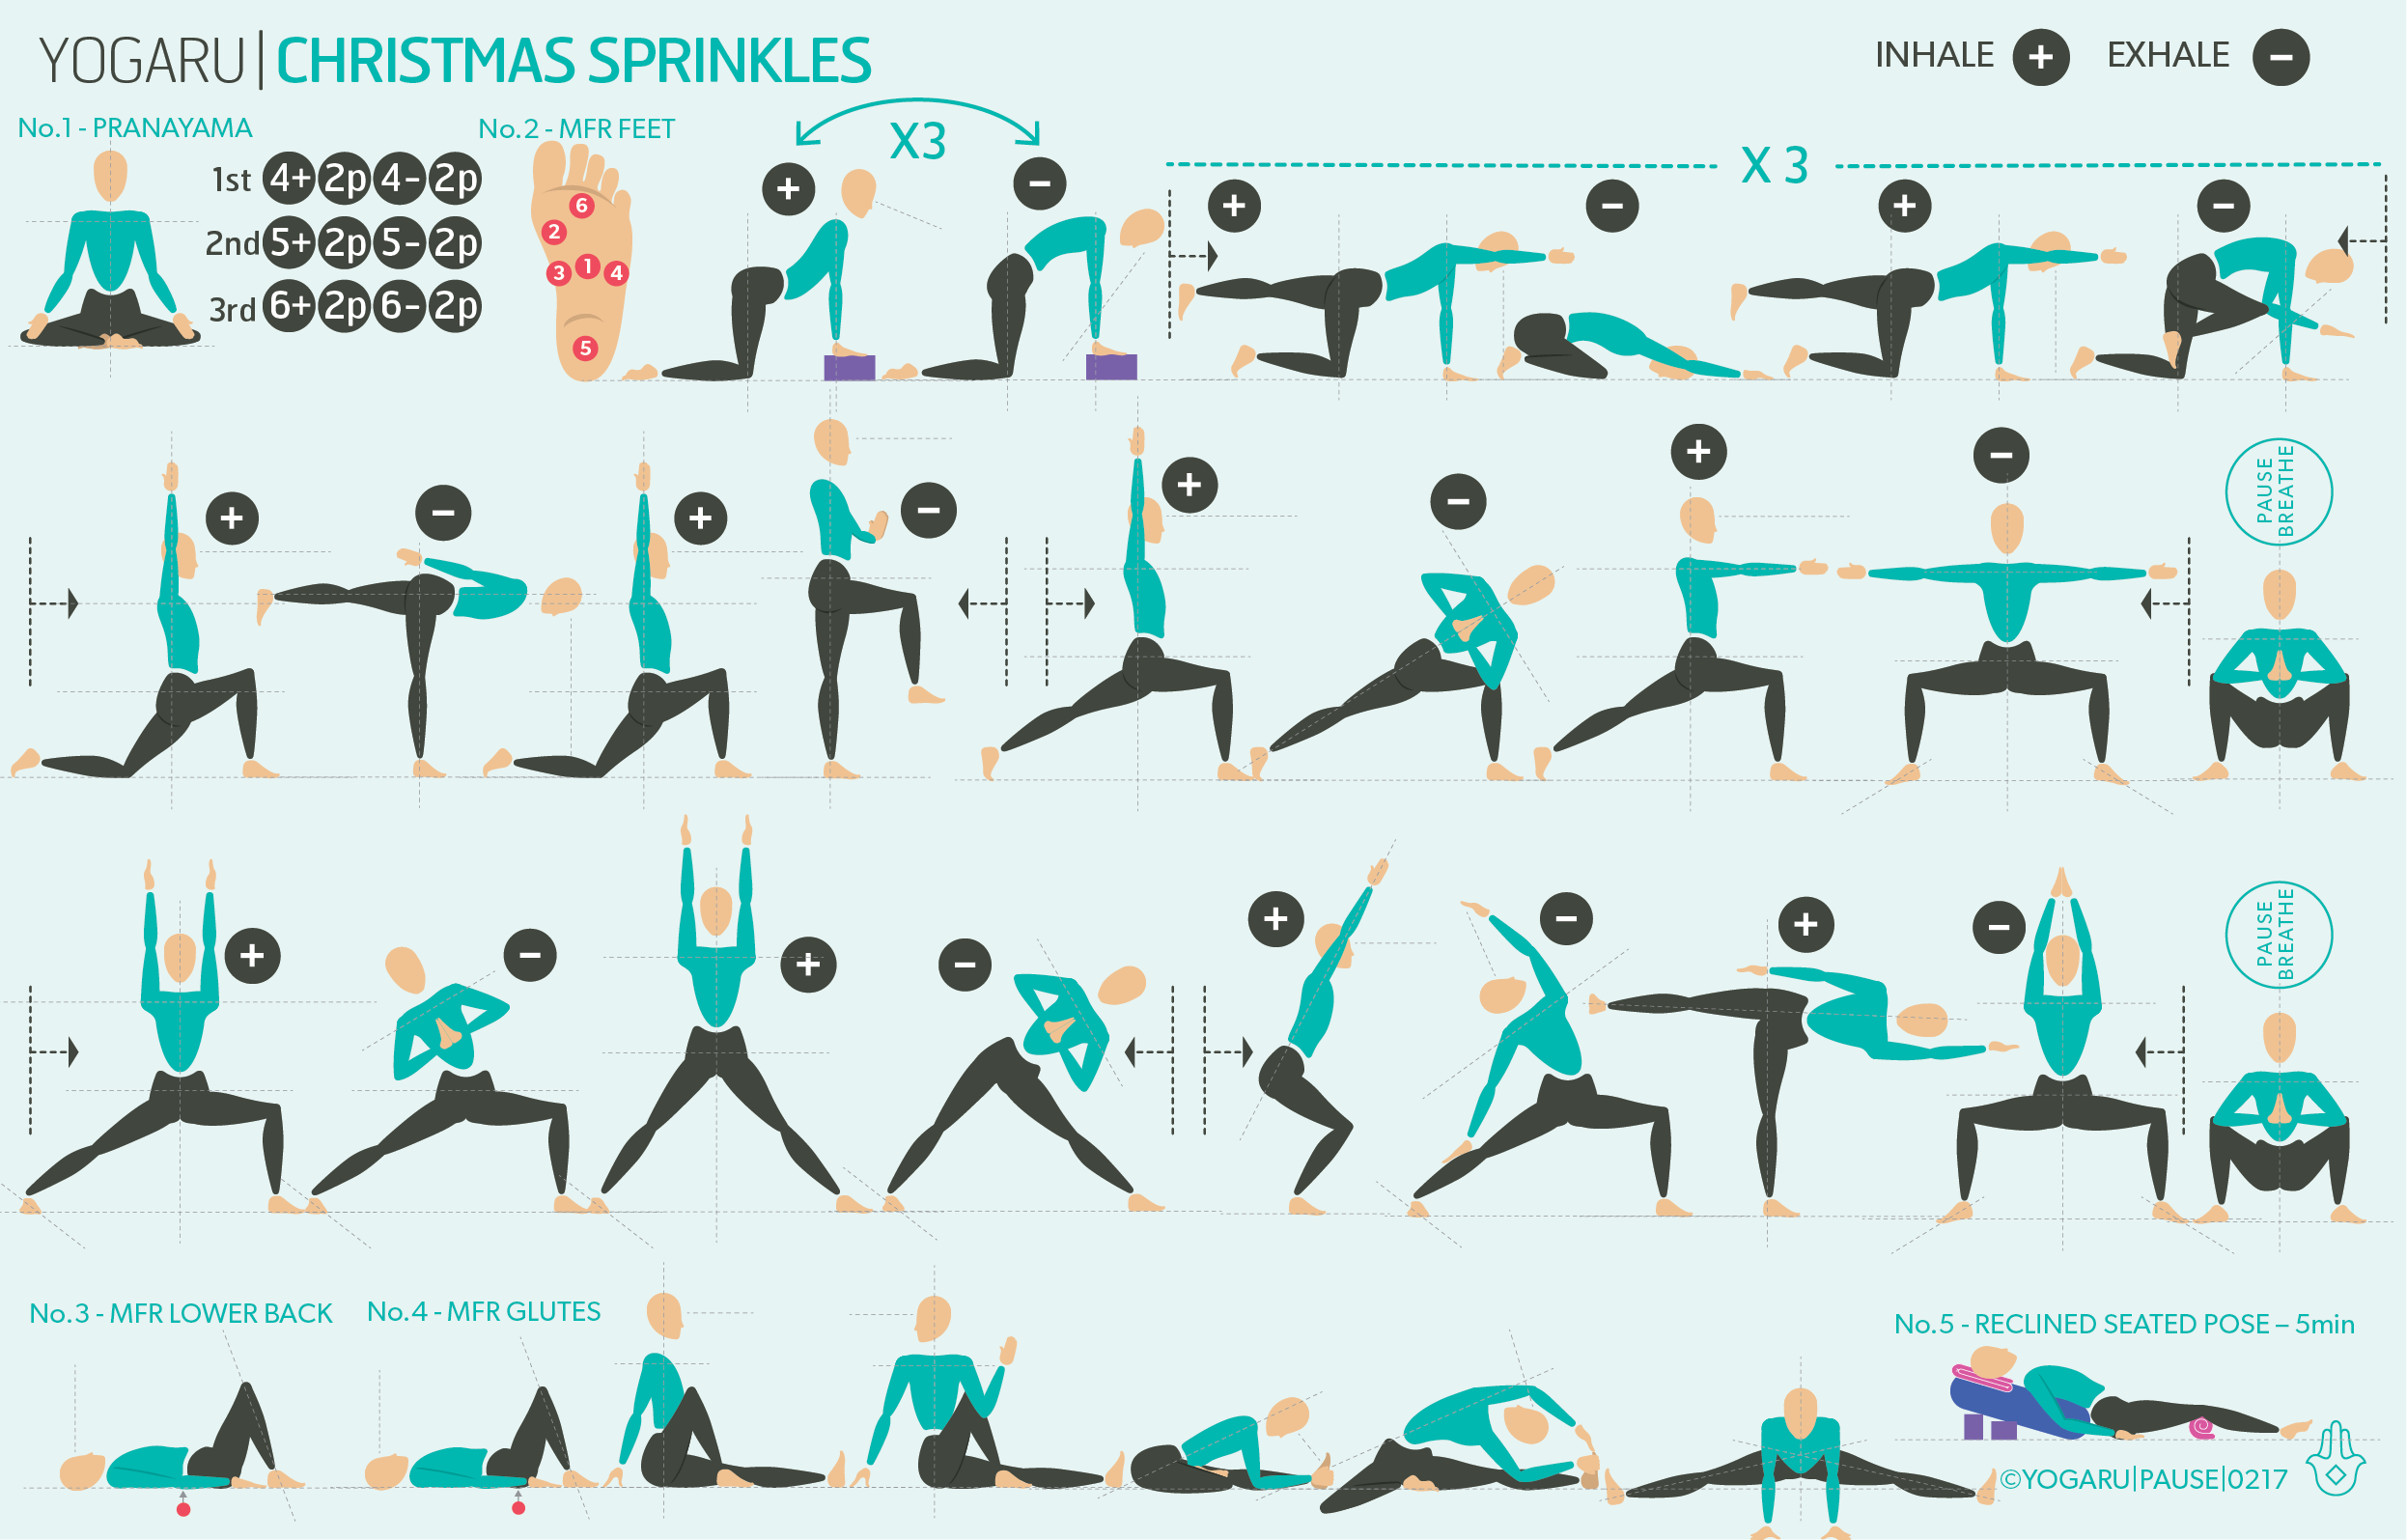
Below are the MFR and pranayama techniques used in this sequence. The props you’ll need are:
1 x MFR balls - or 1 tennis ball.
MFR Feet
Compression - from standing or seated, place 1 x ball at position No.1, gently press down with an inhale and release on the exhale x 5 breaths and move on to No.2. Continue to No.5.
Roll & cross fibre - with the toes on the ground place 1 x ball at No.5, roll the ball across your heel x 5. Place 1 x ball at No.6, roll the ball across the knuckles of your toes x 5. Place 1 x ball at No.6, roll in one direction from toes to heel x 5.
Scribble - roll and scribble across the sole of the foot. Repeat all steps on the other foot.
Pranayama
Sit in a comfortable position – cross legged, sitting up on a brick or straddling a bolster. Inhale for the count of 4, exhale for the count of 4 x 3 rounds. Inhale for the count of 4, pause for 2, exhale for the count of 4, pause for 2 x 3 rounds. Inhale for the count of 4, pause for 4, exhale for the count of 4, pause for 4 x 3 rounds.
To save the images for personal use click and hold down the image until the ‘save image’ option appears; on Mac hold down ‘control’ and click the image to get the option box; on PC right click on the image to get the option box. Scroll down in the ‘option box’ and click ‘save image’.
Ruth Delahunty Yogaru